Showing posts with label pastel nails. Show all posts

Sunday, 18 February 2018

Pastel Rainbow Stripes Nails!

Pastel Rainbow Stripes Nails!

Rating: **


Finished Nails
Tools
I used:
  • Barry M 245 Gold
  • Barry M 304 Mint Green
  • Barry M 306 Blueberry I/C
  • Barry M 348 Prickly Pear
  • Miss Sporty 480 Baby Pink
  • Barry M 705 Quick dry top coat
  • Striping tape

Step 1

Paint your nails gold.


Step 2

Put three strips of striping tape across each nail.


Step 3

Paint each section of the nail a different pastel colour. I used green, blue, purple, and pink. I did all the nails the same but you could change the ordering for the ring finger to make it an accent nail if you wanted. Make sure you remove the tape immediately after you have painted the colours either side of it so you don't end up pulling the nail varnish off once it is dry.


Finally, cover your nails in the top coat to protect them.

If you have any suggestions or questions, please email them to nail.art12345@gmail.com or leave a comment below. And don't forget to head over to our Facebook page and hit like!   


Sunday, 19 April 2015

Easter Bunny Nails!

Easter Bunny Nails

Rating: *****

Finished Nails

Tools

Nail Pens
I used:
  • Collection 23 Baby Blue
  • Miss Sporty 344 Grape Fit
  • Miss Sporty 408 Baby Pink
  • Barry M 304 Mint Green
  • Rio Professional Nail Art Pens (can be bought here)
  • La Femme Top Coat 118
  • Small dotting tool
Step 1 

Paint your nails blue.


Step 2

Using the white nail art pen, draw bunny shapes on your ring fingers.


Step 3

Using the dotting tool and the pastel nail varnishes, add egg shapes to your fingers, near the tip. You can either make them random colours or you can have a pattern.


Step 4

Using the black nail art pen and the pink nail varnish, add an eye and the inside of the ear to each rabbit.


Step 5

Using the nail art pens, add dots and lines to the eggs.


Step 6

Using the green nail art pen, add grass to each nail.


Finally, cover over the design in a top coat to protect it and smooth it out.

If you have any suggestions or questions, please email them to nail.art12345@gmail.com or leave a comment below. And don't forget to head over to our Facebook page and hit like! 


Sunday, 5 April 2015

Dotty Nails!

Dotty Nails!

Rating: **

Finished Nails

Tools
I used:
  • Miss Sporty 344 Grape Fit
  • Miss Sporty Pink 480 Baby Pink
  • Collection 2000 103 French White
  • La Femme Top Coat 118
  • Cocktail stick
  • Small dotting tool
  • Medium dotting tool

Step 1

Paint your nails purple.


Step 2

With the medium dotting tool, place two or three dots down the centre of your nail, making sure they're evenly spaced.


Step 3

With the small dotting tool, add a white dot in the centre of each pink dot.


Step 4

With the cocktail stick, add a pink dot to the centre of the white dots.


Step 5

With the cocktail sick, add white dots around the outside of each large dot.


Finally, cover over the design in a top coat to protect it and smooth it out.

If you have any suggestions or questions, please email them to nail.art12345@gmail.com or leave a comment below. And don't forget to head over to our Facebook page and hit like! 


Sunday, 15 March 2015

Polka Dot Nails!

Polka Dot Nails!

Rating: *


Finished Nails
Tools
I used:
  • Barry M Prickly Pear 348
  • Collection 2000 103 French White
  • La Femme Top Coat 118
  • Small dotting tool

Step 1

Paint your nails purple.


Step 2

Using the dotting tool, add evenly spaced dots on your nails.


Finally, cover over the design in a top coat to protect it and smooth it out.

If you have any suggestions or questions, please email them to nail.art12345@gmail.com or leave a comment below. And don't forget to head over to our Facebook page and hit like! 


Sunday, 1 February 2015

Blue Gradient Nails!

Blue Gradient Nails!

Rating: *

Finished Nails

Tools

I used:
  • Collection 2000 103 French White
  • Primark Ice Queen
  • Make-up sponge


Step 1

Paint your nails white.


Step 2

Using the sponge, create the gradient. You may have to go over it several times, building up the layers to create the effect you would like.


Finally, cover over the design in a top coat to protect it and smooth it out.

If you have any suggestions or questions, please email them to nail.art12345@gmail.com or leave a comment below. And don't forget to head over to our Facebook page and hit like! 


Sunday, 8 September 2013

Pastel dot nails!

Pastel Dot Nails!

Rating: *

Finished Nails

Tools
I used:
  • '17 Heart Beat'
  • 'Maybelline New York 825 Oh So Close'
  • A small dotting tool

Step 1

Paint the nails with the pale blue or any other pastel colour. You will probably need two coats to achieve a smooth finish.


Step 2

Use the dotting tool to place dots in the corner of each nail, trying to make the ones further from the corner slightly smaller.


Finally, clean up around the nails and apply a top coat to prevent chips.

If you have any suggestions or questions, please email them to nail.art12345@gmail.com or leave a comment below  


Saturday, 1 June 2013

Leopard Print Nails!

Leopard Print Nails!

Rating: **

Firstly, I want to apologize that there has been a bit of a break in posting. It's exam season here in the UK so I can't wear nail varnish and I didn't have a back up plan. Hopefully everything should be back to normal soon.

Finished nails
Tools

I used:
  • 'Miss Sporty 344 Grape Fit'
  • 'Barry M 306 Blueberry I/C'
  • 'Barry M Nail Art Pen silver'
  • 'Barry M Nail Art Pen black'
  • 'Barry M 54 Clear'

Step 1

Paint the nails with your base colour. For this design you can use any colour you like, although a pastel colour works best. I chose to do one design with purple and another with blue. Don't worry if it is messy, you can clean it up at the end either with a cotton bud and nail varnish remover or you can peel it off!


Step 2

Paint silver spots on your nails. Make them all slightly different shapes and sizes and aim for around 4 or 5 spots on each finger, depending on the size of the nail.


Step 3

Draw black lines around each of the silver spots and add some small lines in between each spot too, to create the leopard print effect.


Step 4

Paint over each nail with a top coat to seal in the design


Finally, clean up around the nails to make them look neat.
If you have any suggestions or questions, please email them to nail.art12345@gmail.com or leave a comment below


Sunday, 14 April 2013

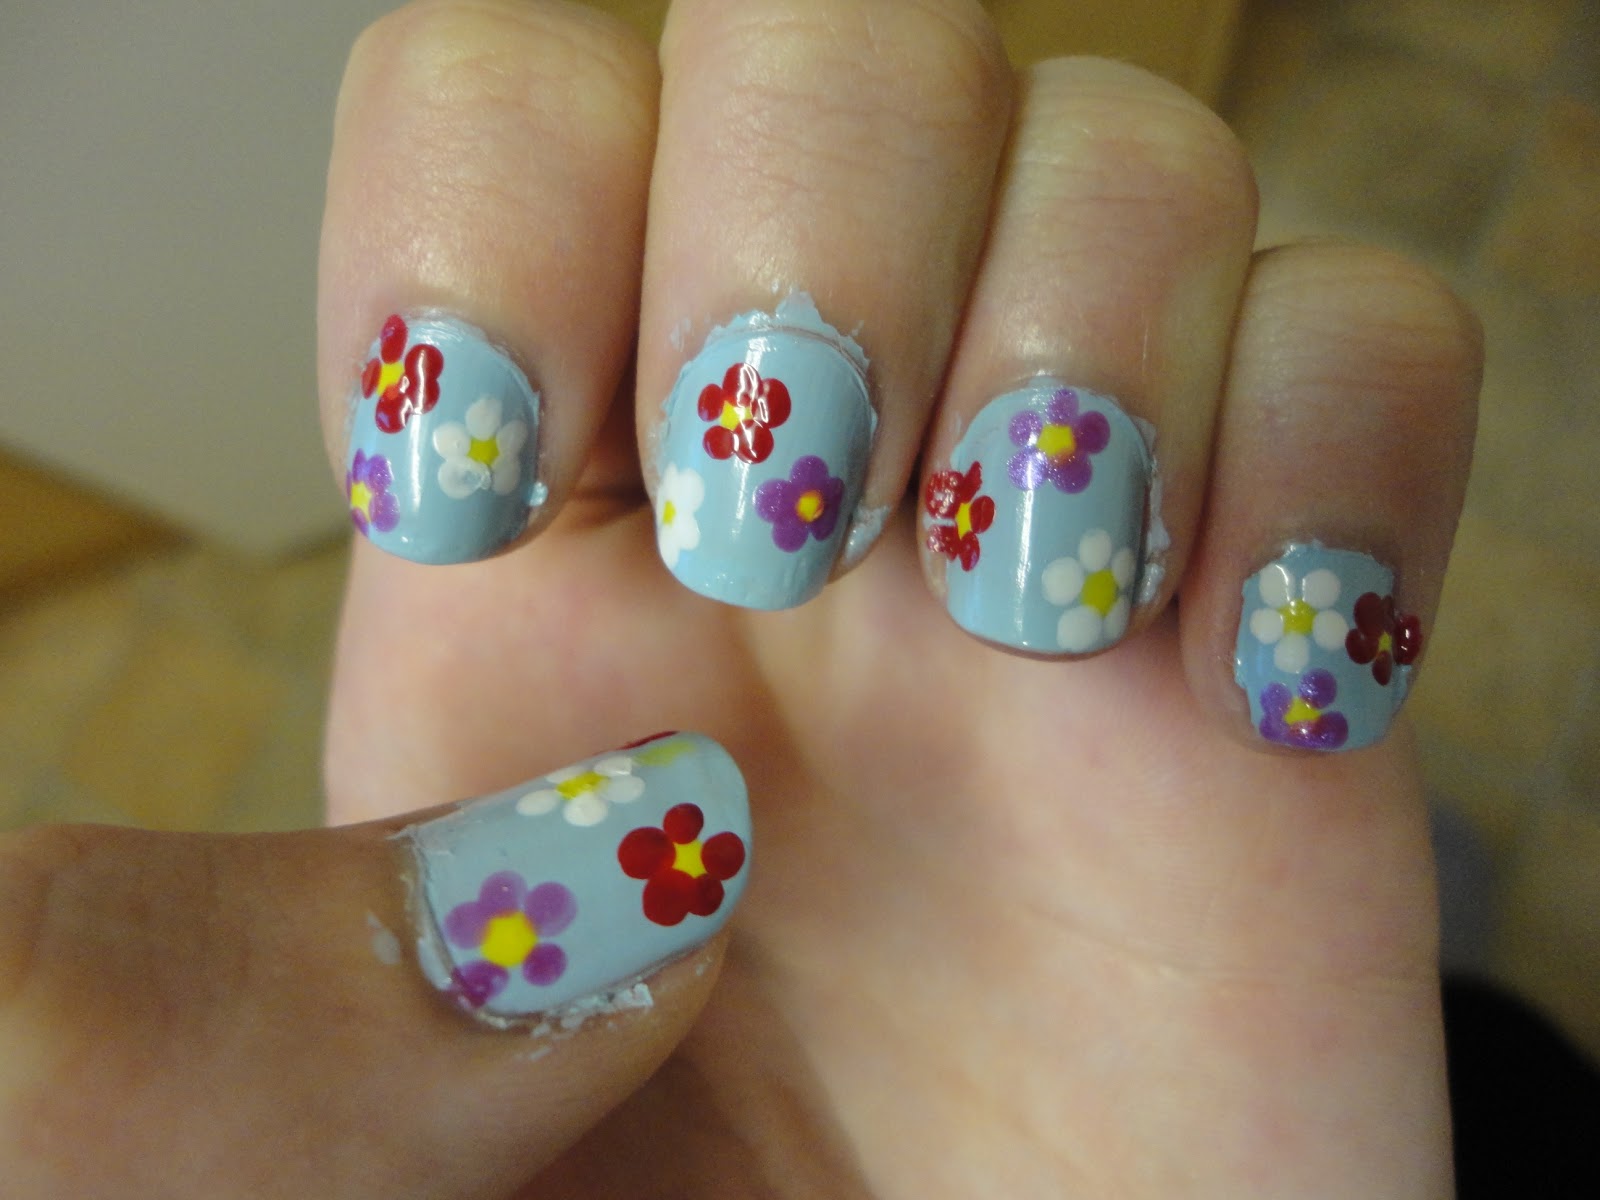
Spring Flower Nails!

Spring Flower Nails!

Rating: *

Finished nails
Tools
I used:
  • '17 Heartbeat'
  • 'Rimmel Lasting Finish 280 Sunshine'
  • 'Collection 2000 103 French White'
  • 'The Colour Workshop Purple Glaze'
  • 'Rimmel Lasting Finish 030 Double Decker Red'
  • 'Barry M 54 Clear'
  • A small dotting tool

Step 1

Paint the nails using a pastel shade. I used pale blue but any pastel/pale colour would work just as well. Don't worry if it is messy, you can clean it up at the end either with a cotton bud and nail varnish remover or you can peel it off!


Step 2

Use the dotting tool to place yellow dots on your nails for the centers of the flowers. I did three on each nail (except the thumbs where I did 4) but you can do as many or as little as you would like, although too many would become crowded and ruin the effect. Make sure you leave enough space around them for the petals, unless you are doing loads and want them to overlap.


Step 3

Use the dotting tool to place 5 white dots around one of the yellow dots on each finger, to make the flowers. If you don't want to use the same colours as me then start with the palest colour as, if the petals end up overlapping, the paler colour will struggle to be seen over the darker ones.


Step 4

Use the dotting tool to place 5 pale pink dots around one of the yellow dots on each finger, to make the flowers. Again, if you aren't using the same colours as me, this should be your middle shade.


Step 5 

 Use the dotting tool to place 5 red dots around one of the yellow dots on each finger, to make the flowers. Again, if you aren't using the same colours as me, this should be your darkest colour.


Step 6

Paint over each nail with the top coat to seal in the design.

Finally, clean up around the nails to make them look neat.
 
If you have any suggestions or questions, please email them to nail.art12345@gmail.com or leave a comment below