Sunday 24 September 2017

Blue and White Gradient Nails!

Blue and White Gradient Nails!

Rating: **

Finished Nails
Tools
I used:
  • Barry M 629 Matte White
  • Barry M 306 Blueberry
  • Color Show 661 Ocean Blue
  • Barry M Quick Dry Top Coat 704
  • Striping tape
  • Makeup sponge

Step 1

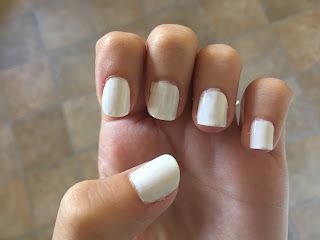
Paint your nails white. 


Step 2

Stick 3 or 4 pieces of striping tape across your nails. I also find it is a good idea to put liquid latex around your nails when doing gradients as it makes cleaning up your fingers much easier!


Step 3

Using the sponge, paint white, pale blue, and dark blue stripes on it and dab it on each nail to create the gradient. You may need to reapply the varnish a few times for each finger. Once you are happy with the gradient, carefully and quickly peel off the tape in the reverse order you applied it, and the liquid latex if you've used it.


Finally, cover your nails in the top coat to protect them.

If you have any suggestions or questions, please email them to nail.art12345@gmail.com or leave a comment below. And don't forget to head over to our Facebook page and hit like!  

Sunday 17 September 2017

SSAGO Nails!

SSAGO Nails!

Rating: **

This year marks the 50th birthday of the Student Scout and Guide Organisation (SSAGO) here in the UK. This weekend was their reunion camp so I did these nails to wear there. If you are heading off to university in the UK and are interested in joining SSAGO (you don't need to have done Guiding or Scouting before) you can find your nearest club at ssago.org/clubs

Finished Nails
Tools

I used:
  • Barry M 629 Matte White
  • Barry M 290 Spring Green
  • Rimmel 452 Chin Up Buttercup
  • Barry M Quick Dry Top Coat 704
  • Small paintbrush

Step 1

Paint your nails white. You only need one coat as this is just to protect your nails from staining. 


Step 2

Paint all your nails green, except your ring fingers. I ended up doing three coats of this as it is quite thin.


Step 3

Paint your ring fingers yellow.


Step 4

Using the paintbrush, paint the green part of the SSAGO logo on your ring fingers. Start smaller than you expect and gradually build it up so it is the right size.


Step 5

Using the paintbrush, paint the yellow part of the SSAGO logo on top of the green part.


Finally, cover your nails in the top coat to protect them.

If you have any suggestions or questions, please email them to nail.art12345@gmail.com or leave a comment below. And don't forget to head over to our Facebook page and hit like!   


Sunday 10 September 2017

Gold and Black Swirl Nails!

Gold and Black Swirl Nails!

Rating: *


Finished Nails
Tools

Stamp

I used:
  • Barry M 632 Gold Digger
  • Black Stamping polish
  • Barry M Quick Dry Top Coat 704
  • Stamping tool

Step 1

Paint your nails with the gold.


Step 2

Using the nail stamper and the black stamping polish, stamp swirls over your whole nail.


Finally, cover your nails in the top coat to protect them.
 
If you have any suggestions or questions, please email them to nail.art12345@gmail.com or leave a comment below. And don't forget to head over to our Facebook page and hit like!