Spring Flower Nails!
Rating: *
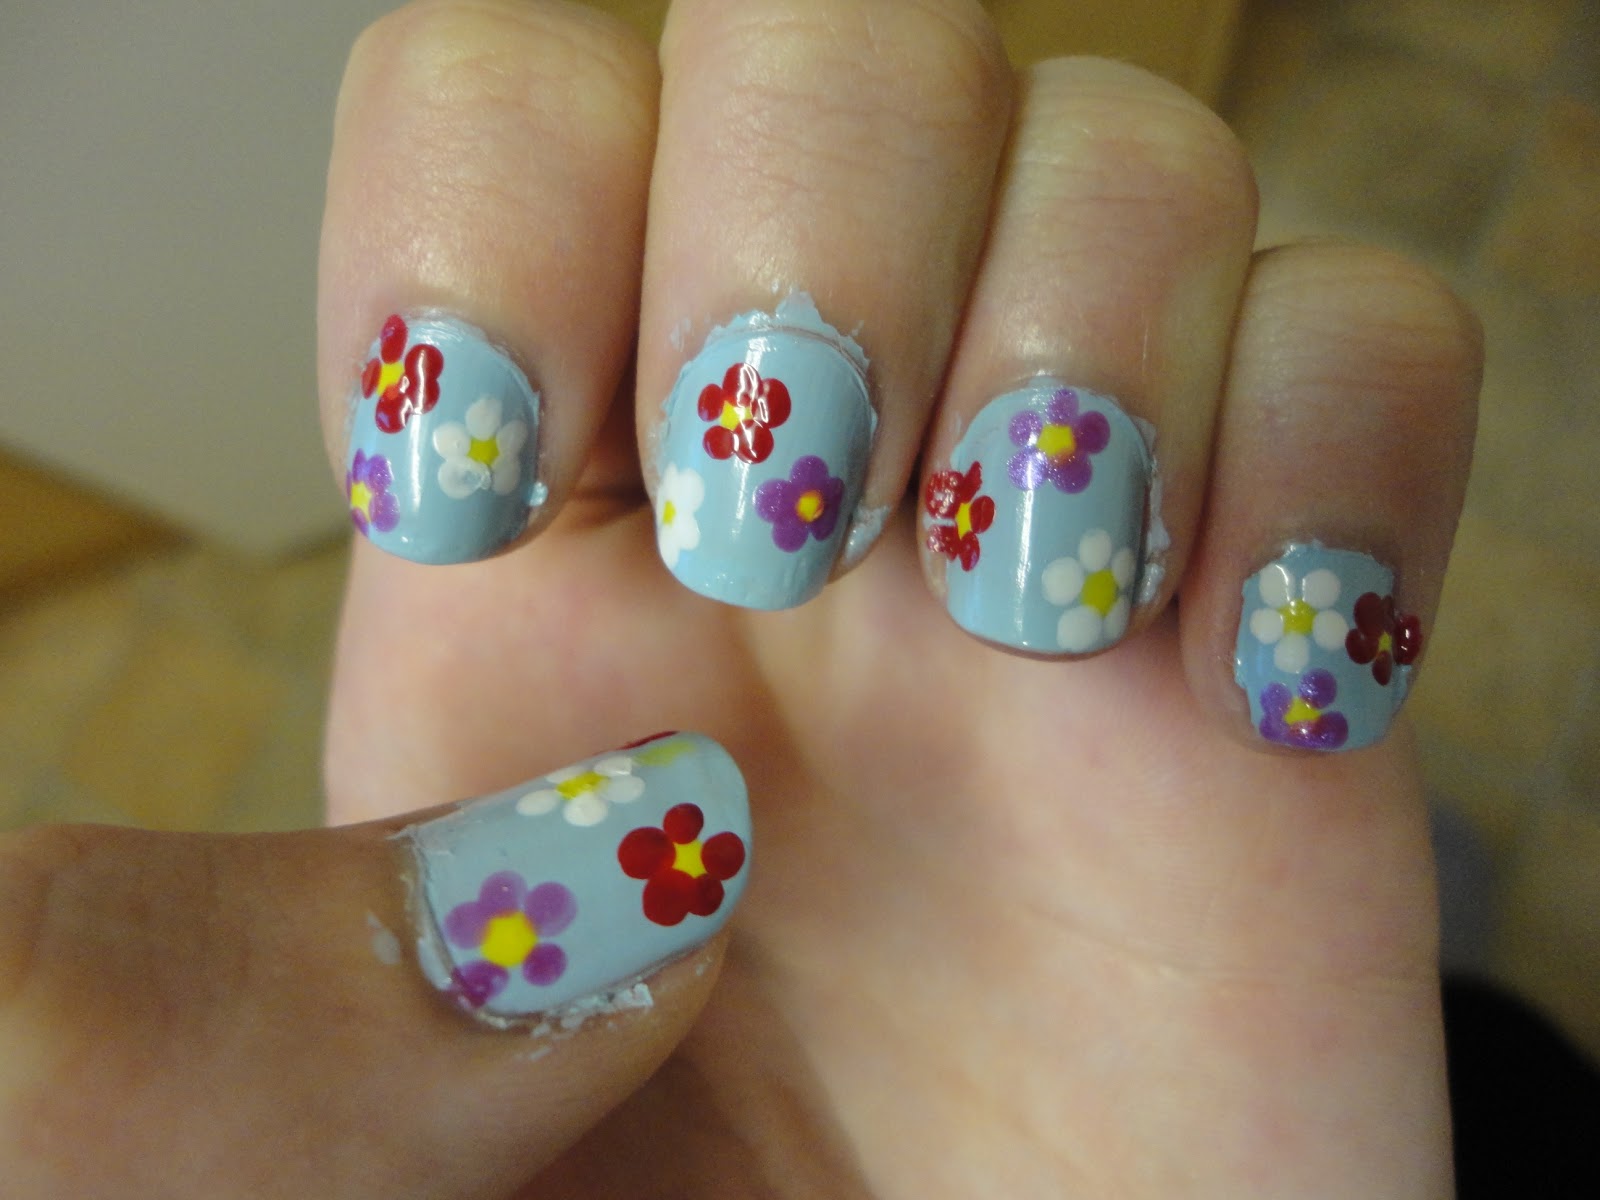 |
| Finished nails |
 |
| Tools |
I used:
- '17 Heartbeat'
- 'Rimmel Lasting Finish 280 Sunshine'
- 'Collection 2000 103 French White'
- 'The Colour Workshop Purple Glaze'
- 'Rimmel Lasting Finish 030 Double Decker Red'
- 'Barry M 54 Clear'
- A small dotting tool
Step 1
Paint the nails using a pastel shade. I used pale blue but any pastel/pale colour would work just as well. Don't worry if it is messy, you can clean it up at the end either with a
cotton bud and nail varnish remover or you can peel it off!

Step 2
Use the dotting tool to place yellow dots on your nails for the centers of the flowers. I did three on each nail (except the thumbs where I did 4) but you can do as many or as little as you would like, although too many would become crowded and ruin the effect. Make sure you leave enough space around them for the petals, unless you are doing loads and want them to overlap.

Step 3
Use the dotting tool to place 5 white dots around one of the yellow dots on each finger, to make the flowers. If you don't want to use the same colours as me then start with the palest colour as, if the petals end up overlapping, the paler colour will struggle to be seen over the darker ones.

Step 4
Use the dotting tool to place 5 pale pink dots around one of the yellow dots on each finger, to make the flowers. Again, if you aren't using the same colours as me, this should be your middle shade.

Step 5
Use the dotting tool to place 5 red dots around one of the yellow dots on each finger, to make the flowers. Again, if you aren't using the same colours as me, this should be your darkest colour.
Step 6
Paint over each nail with the top coat to seal in the design.
Finally, clean up around the nails to make them look neat.
If you have any suggestions or questions, please email them to nail.art12345@gmail.com or leave a comment below
No comments:
Post a Comment